> Note: This setup only works for persona-3-dual and aegis-engine. p3d-amicitia dev setup is NOT covered.
The team uses melonDS for testing, VS Code as the development IDE, & Docker as the development environment.
Prerequisites
Section titled “Prerequisites”You need to have melonDS, VS Code, & Docker already installed on your system.
melonDS
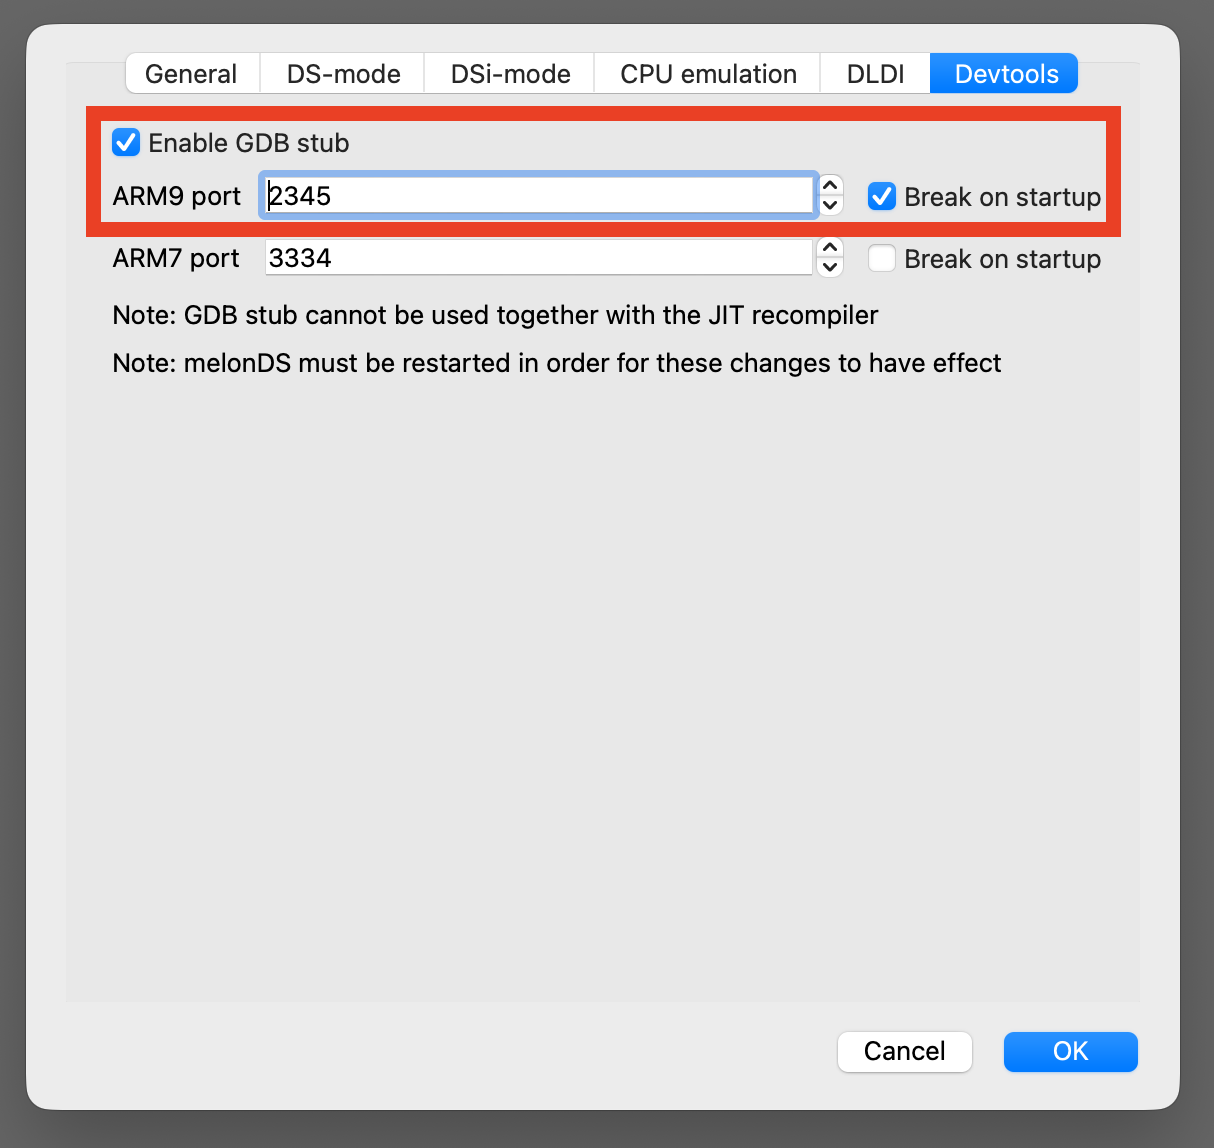
Section titled “melonDS”- Go to Config → Emu settings → Devtools
- Ensure Enable GDB stub is checked
- Ensure the ARM9 port is 2345 & Break on startup is checkedWhen debugging, ensure that melonDS is already launched
VS Code
Section titled “VS Code”- Ensure that the Dev Containers extension is installed
Docker
Section titled “Docker”- Ensure that Docker is launched & runningDocker needs to be running whenever you want to code
1. Clone the Repo
Section titled “1. Clone the Repo”persona-3-dual
Section titled “persona-3-dual”git clone --recurse-submodules https://github.com/p3d-project/persona-3-dual.gitcd persona-3-dualaegis-engine
Section titled “aegis-engine”git clone --recurse-submodules https://github.com/p3d-project/aegis-engine.gitcd aegis-engine2. Set Up Code Formatting
Section titled “2. Set Up Code Formatting”This project uses pre-commit to auto-format all source files before every commit. It handles C/C++ (clang-format), Python (black + ruff), and web files (prettier).
Install pre-commit:
# macOS
brew install pre-commit# Windows / Linuxpip install pre-commitRegister the hooks:
pre-commit installThat's it. Hooks run automatically every time you run git commit.
What happens during a commit:
The hooks reformat your staged files in-place. If any file is changed, the commit is aborted so you can review the diff. Just re-stage and commit again.
Run hooks manually (e.g. before opening a PR):
pre-commit run --all-files> Windows note: prettier requires Node.js. pre-commit downloads a local copy automatically the first time you run pre-commit install or pre-commit run.
3. Open the repo in VS Code
Section titled “3. Open the repo in VS Code”Open the persona-3-dual repo in VS Code. Then, click the bottom left >< icon & select Reopen in Container
You may also see a notification on the bottom right to Reopen in Container. This method also works! If this is your first time launching the container, it may take a few minutes for Docker to install the image. Otherwise, VS Code should re-launch within a few seconds.
You are now ready to code!
Building
Section titled “Building”To build, simply use make. If you do not need to update the SD card image, use make SKIPSD=1
If this error appears
[in#0 @ 000001fea6e491c0] Format mov,mp4,m4a,3gp,3g2,mj2 detected only with low score of 1, misdetection possible!
[in#0 @ 000001fea6e491c0] moov atom not found
[in#0 @ 000001fea6e48f80] Error opening input: Invalid data found when processing input
Error opening input file C:/p3d/persona-3-dual/assets/video/base.mp4.
Error opening input files: Invalid data found when processing input
Its most likely due to non pulled LFS media. Pull it with
git lfs pull
Debugging
Section titled “Debugging”Ensure melonDS is already launched & awaiting the debugger
- Build in debug mode (you can use the make debug task or just open a terminal inside the container and run make DEBUG=1)
- In VS Code, go to the Run and Debug tab on the left panel, and select [Docker] (gdb) Connect to melonDS
You are now ready to debug!
If you are unable to connect the debugger to melonDS, ensure that melonDS is launched WITH THE GAME & has the below settings configured